The concrete power float, a state-of-the-art surfacing device, transforms concrete surfaces from rough to refined. It significantly enhances the surface's smoothness, density, and abrasion resistance. Offering an efficiency boost manyfold over manual labor, this machine is a staple in concrete pavements, floors, airports, and similar structures. This article delves into the power float's nature, optimal usage times, and operational methods.
Unveiling the Power Float
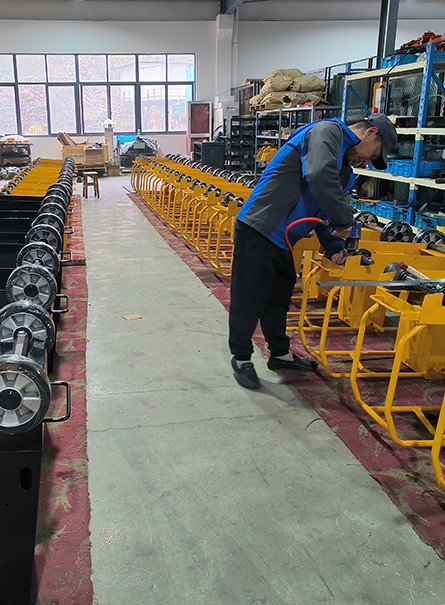
Known also as a concrete power trowel or helicopter machine, the power float is pivotal in imparting a sleek finish to concrete slabs. Available in two variations: ride-on and walk-behind, it's a popular choice for concrete flooring tasks.
Seeking a top-notch concrete power float?
We provide! Our range includes both ride-on and walk-behind models, complete with superior blades and pans.
Optimal Timing for Power Floating Concrete
- Utilize a manual float for small surfaces.
- Larger areas benefit from hand-powered or ride-on power floats for their speed and efficiency.
- Power floats are relatively straightforward to operate, yet mastering their full potential requires practice and training.
- Achieving a flawless, level surface on fresh concrete involves timely treatment before it sets.
- Plan your pour for a clear weather day. Post-pour, the concrete mix begins its drying process.
- Timing the initiation of your power float is crucial.
- A useful indicator to start power floating is when footprints on the concrete surface are around 1/8″-1/4″ deep and walking on it doesn’t cause the top layer to stick to your boots.
Usage Guidelines
- Preparation
- Ensure removal of all loose packaging from the machine.
- Inspect the machine and its parts for damage. Visible damage means halt operation and contact your dealer.
- Confirm all included items and loose components are accounted for.
- Add necessary fluids: fuel, engine oil, and, if applicable, battery acid.
- Installing Float Blades
Three blade types are available for these machines. Float pans, large blades for early stage work, remain unpitched. Finishing blades, for later stages, are progressively pitched for concrete burnishing.
Combination blades serve throughout the concrete working process, replacing float pans and finishing blades.
Note: Avoid using larger blades on a smaller diameter power float.
Finishing blades, flat on both edges, can be installed either way. For combination blades, orient them as shown to align correctly with the machine's clockwise rotation. Secure blades with screws , greasing their threads for easy removal later.
Warning: Never lift the machine overhead with a float pan attached to avoid accidental falls and injuries.
- Pre-Start Checklist
Before starting, check for:
- Grease-free handles.
- Neutral control levers.
- Tightened bolt joints.
- Fuel level.
- Engine and gearbox oil levels.
- Air cleaner maintenance indicator.
- Ring guard and trowel arms and blades conditions.
Notice: Confirm oil levels in the engine and machine before starting. Warranties void if operated without oil.
- Handle Installation and Adjustment
Unpack and inspect the handle assembly and lower unit for shipping damages. Attach the handle assembly to the gearbox on the lower unit using supplied 10mm nuts.
For pitch control, pull the cable from the tube end, remove the cable nut , and push the control knob forward or turn the twist pitch control handle counterclockwise. Attach the cable to the yoke, adjusting the cable nut for snugness and flat float blade alignment (0° pitch).
Set throttle to idle, feed cable through the recoil cover clamp, and connect it to the engine throttle bracket. Replace the air cleaner cover.
Adjustable handles can be repositioned for operator comfort by loosening the knob and adjusting the handle's height.
- Safety Stop Switch
Ensure the switch operates freely and is always in good condition. With the switch off, the engine should not start or run. This switch is designed to stop the engine in emergencies (e.g., operator releasing the handle during use).
- Starting the Machine
Know the location and function of all controls before starting.
Ensure the safety stop switch is in the stop position.
- Open fuel valve.
Note: For cold engines, close choke; for hot engines, open choke.
- Switch engine to "On".
- Set throttle to idle.
- Pull starter rope.
Warning: Avoid placing a foot on the ring guard during startup to prevent injuries.
- Gradually open choke as the engine warms.
- Increase throttle and activate safety stop switch to start power floating. Adjust blade rpm with throttle to match conditions.
Maneuvering the Power Float
Practice operating a typical walk-behind power float. Let the machine work for you.
Practice as if finishing a concrete slab, edging, and covering large areas. A good technique is working backward, being mindful of hazards. Familiarity comes with repeated use.
To move left, lift the handle; to move right, push it down.
If you release the machine, step back and let it stop before attempting recovery.
The best finishing method involves walking backward with the power float, guiding it side to side, covering all footprints on wet concrete.
Stopping the Machine
To stop, reduce engine rpm to idle and release the safety stop switch. Then, turn the engine switch to "Off".
Pitch Adjustment
Adjust blade pitch with the twist pitch control knob. Clockwise increases pitch; counter-clockwise flattens it.
Floating Operation
Attach float blades, and once the concrete can bear the machine's weight, start floating. Adjust the blades using the tilt adjustment knob for a flat position with enough tension to prevent bouncing or chattering.
Finishing Operation
After floating, wait until the concrete can support the power float. Set blade pitch to about 1/4″ to 3/8″. If blades dig into the concrete, decrease pitch.
Conclusion
The concrete power float is a multifaceted tool, ideal for smoothing and leveling concrete in various contexts. While it's effective for minor repairs or larger leveling projects, cautious usage is paramount to prevent inadvertent damage.